
How to Choose the Best Studio Ring Light?
Choosing the right Studio Ring Light can change how your videos, portraits, and product demonstrations look. A flattering glow is useful, but brightness alone does not guarantee professional results. Skin tones may appear dull under poor LEDs, while uneven light can create distracting shadows around the nose and eyes. Your room, camera, subject, and shooting distance all influence the best choice.
A practical evaluation starts with color quality. Look for a high CRI rating, preferably 90 or above, when accurate skin and product colors matter. Adjustable color temperature can shift the scene from warm indoor light to a cooler daylight appearance. Smooth dimming is also important. Cheap controls may create visible flicker, especially when recording at faster shutter speeds. I once assumed a brighter light was better, but it quickly produced harsh highlights on glasses and oily skin.
Size matters too. A 10-inch model suits desk filming, while an 18-inch ring can cover a seated subject more evenly. Check the stand’s stability, phone holder, power source, and heat after extended use. A quiet fan helps during interviews, although some compact lights become warm without one. There is no perfect model for every studio. Consider your camera, available space, budget, and daily workflow before buying. Test the light at your actual filming distance. Small details often matter most.
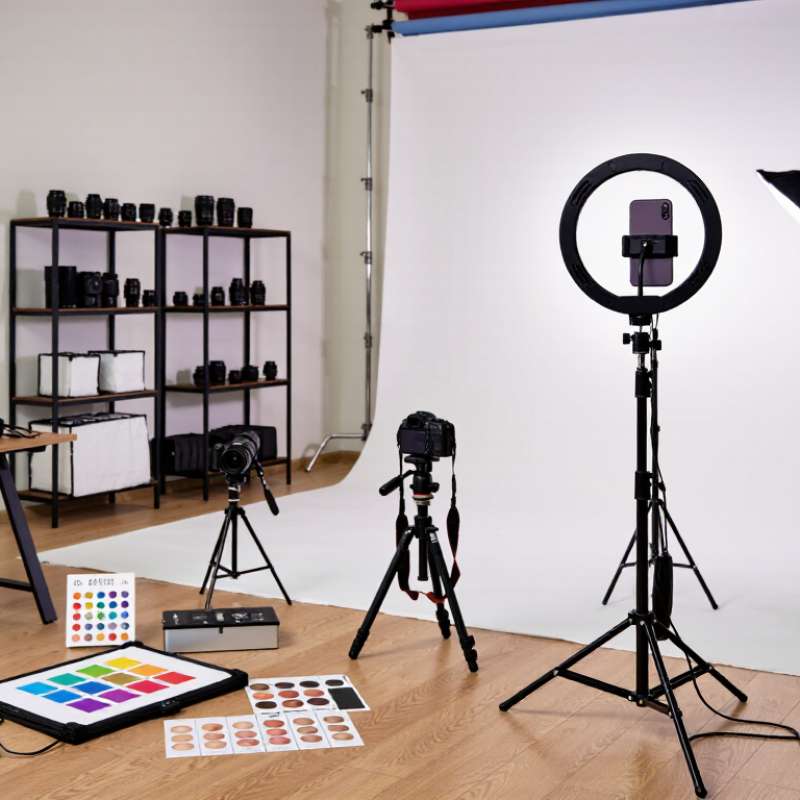
Define Your Studio Ring Light Requirements
How to Choose the Best Studio Ring Light?
Define Your Studio Ring Light Requirements
Before choosing a studio ring light, identify what you actually need to illuminate. A small desk setup needs less power than a full-body portrait area. Measure your available space first. A large light can dominate a narrow room and create awkward shadows.
Think about your camera distance, subject size, and filming schedule. If you record close-up tutorials, adjustable brightness and soft diffusion matter greatly. For full-body videos, choose wider coverage and a stable stand. Color temperature control helps match daylight, room lamps, or a neutral studio look. Check the light’s mounting options if you use a phone, camera, or microphone. A bright light is not always better. Excessive output may flatten facial texture or cause eye strain.
Tips: Start with the face. Test the light at eye level and slightly above it. Keep a notebook of useful brightness settings. Leave space around the stand for safe movement. I once underestimated cable length, and the setup became inconvenient despite good lighting. That detail is easy to miss.
During testing, record a short clip with your real camera settings. Inspect skin tones, reflections in glasses, background shadows, and flicker. Some lights appear comfortable to the eye but produce uneven exposure on video. Read technical specifications from reliable sources, then compare them with practical demonstrations. Your room’s wall color can also change the result. A pale wall may bounce light softly, while a dark wall absorbs much of it. Reconsider your requirements after one real recording session.
How to Choose the Best Studio Ring Light? - Define Your Studio Ring Light Requirements
| Requirement | Compact Setup | Standard Studio | Large Studio | Why It Matters |
|---|---|---|---|---|
| Typical application | Video calls, tutorials, product photos | Portraits, livestreams, beauty content | Full-body portraits, group scenes, commercial sets | The intended use determines the required coverage, brightness, and accessories. |
| Recommended light diameter | 8–12 in (20–30 cm) | 14–18 in (35–46 cm) | 18–22 in (46–56 cm) | A larger diameter produces broader, softer illumination and more even facial lighting. |
| Recommended output at 1 m | 500–1,000 lux | 800–1,500 lux | 1,200–2,500 lux | Higher output is useful when the subject is farther from the light or the room has strong ambient light. |
| Color temperature | 3,200–5,600 K | 3,200–5,600 K | 2,700–6,500 K | Adjustable color temperature helps match daylight, warm room lighting, and different creative styles. |
| Color rendering quality | CRI 90 or higher | CRI 95 or higher | CRI 95 or higher; TLCI 95 or higher preferred | High color rendering keeps skin tones, fabrics, and products looking more accurate on camera. |
| Brightness adjustment | 10%–100% dimming | 1%–100% dimming preferred | 1%–100% dimming with precise controls | Smooth dimming makes it easier to balance highlights, shadows, and exposure. |
| Light position and height | Desk stand or 1.5–2 m tripod | 2–2.4 m adjustable stand | 2.4–3 m heavy-duty stand or boom | Correct height and angle help prevent unflattering shadows under the eyes and chin. |
| Power requirement | 10–25 W; USB or compact AC adapter | 30–60 W; AC adapter recommended | 60–120 W; dedicated AC power preferred | Higher output generally requires a more capable power supply and better heat management. |
| Flicker performance | Flicker-free at common shutter speeds | Flicker-free across video frame rates | Flicker-free with documented testing preferred | Flicker can create visible banding or brightness changes in recorded video. |
| Control method | On-light buttons or wired controller | Remote control or wired controller | Remote, app, DMX, or multi-light control | Remote operation saves time when the light is mounted above or behind the subject. |
| Useful accessories | Phone holder, mirror, tabletop stand | Diffuser, camera mount, carrying case | Diffuser, grid, boom arm, sandbags, multiple-light support | Accessories improve positioning, softness, safety, and consistency during production. |
| Suggested buying priority | Portability, simple controls, adjustable color temperature | Color accuracy, output, diffusion, stable mounting | Output consistency, cooling, control integration, durability | Prioritize features that directly support the room size, subject distance, and production schedule. |
Compare Ring Light Size, Brightness, and Color Temperature
Choosing the best studio ring light starts with the subject, not the diameter. A 10–12-inch model suits close-up desk shots. An 18-inch model spreads light across shoulders and small products. Larger size usually creates softer shadows because the apparent light source becomes broader. I have found distance matters as much as diameter. A large ring placed too far away can still produce harsh facial shadows. Try 45–75 centimeters from the subject, then adjust by eye. It is not a fixed rule.
Brightness should be judged in lux at a stated distance, not by wattage or vague “professional” claims. Many creators begin around 800–1,500 lux for talking-head videos. Camera aperture, ISO, and room color still change the result. Ask for photometric test conditions. IES LM-79-19 recommends standardized electrical and photometric measurements for LED products, making comparisons more reliable. Small lights may look bright at 30 centimeters but weaken quickly across a room. That detail is easy to miss.
Color temperature controls mood and skin appearance. Daylight settings around 5,600–6,500 K look crisp, while 3,200 K resembles warm indoor lamps. CIE 015:2018 identifies D65 at approximately 6,500 K, a useful daylight reference. Choose adjustable color temperature when window light changes. An IES TM-30 report should provide fidelity and gamut metrics, rather than relying only on CRI. Higher numbers are not automatically perfect. In my tests, mixed window light and warm LEDs created uneven skin tones. Matching light sources often works better than chasing maximum brightness.
Evaluate Mounting Options, Controls, and Power Sources
A ring light is only useful when its mounting system suits your studio routine. I look for a stand with a broad, weighted base, especially on hard floors. A loose tripod can wobble when a camera, phone, and diffuser are attached. Test the height range beside your chair. A flexible arm helps with overhead angles, but it can sag over time. Wall mounts save floor space, yet they reduce repositioning. This trade-off is easy to underestimate.
Physical knobs are valuable during a live shoot because they offer quick, tactile adjustments. Check whether brightness changes smoothly rather than jumping between harsh levels. Color temperature control matters when skin tones must match window light or another lamp. A small display can show settings clearly, although bright displays may distract during close portraits. I once trusted a touch panel and changed the output accidentally with my sleeve. Simple controls are not always less professional.
For studio work, mains power is usually stable and suitable for long sessions. Still, a battery option can help when photographing in a small room, on location, or near an inconvenient outlet. Check cable length, connector security, and heat around the power adapter. A light that dims after an hour can ruin consistent exposure. I also prefer visible power information, though I sometimes value portability too much. That compromise deserves honest testing before purchase.
Check Compatibility With Cameras and Studio Accessories
A studio ring light should fit your camera system, not merely look bright. Before buying, check the mounting method and the light’s inner diameter. A large camera body may block the center opening. Small detail, big problem. Confirm whether the light supports your camera’s weight, lens length, and shooting angle. A front-heavy setup can slowly tilt a weak bracket.
Match the light with your existing stand, softbox, diffuser, and microphone. Check thread sizes, adapter types, and the stand’s maximum load. Some lights use special fittings, which can limit future upgrades. Also inspect cable length and power requirements. A nearby outlet is not always enough. Leave room for a power strip and safe cable routing. For video, test dimming at several levels. Poor electronics can create visible flicker, even when footage looks clean on the preview screen. Compare color temperature and color rendering with your other fixtures. Mixed light can make skin tones look uneven.
In practical shoots, I test the complete setup before trusting it. I mount the camera, lens, microphone, and diffuser, then tilt the light through the intended angles. This reveals loose joints and blocked controls. I once overlooked lens clearance and lost valuable framing space. That mistake changed my checklist. If wireless control matters, verify compatibility with your camera workflow and studio network. Read the technical manual, not only the product page. Specifications can be incomplete. A compatibility test with your actual accessories is slower, but far more reliable.
Assess Durability, Portability, and Overall Value
How to Choose the Best Studio Ring Light?
Durability matters when a ring light faces daily adjustments, warm rooms, and occasional transport. Check the hinge, tripod mount, cable connection, and dimmer before buying. These parts often reveal weak construction faster than the outer casing. A stable light should remain steady when you rotate the phone or camera. I once tested a model with a strong frame but a loose mount. It looked professional, yet small vibrations affected close-up filming.
Portability should match your actual studio routine. Measure the folded light, stand, and carrying case together. A compact design helps freelancers move between rooms, but extremely light stands may tip on thick carpets. Look for protected controls, a replaceable power cable, and simple height adjustments. Keep it practical. You may not need wireless features if the light stays beside one desk.
Overall value depends on performance over time, not the lowest purchase price. Compare light output, color consistency, warranty terms, and included accessories. A useful ring light should produce even illumination across the face without harsh shadows. Check the color rendering rating when accurate skin tones matter. My own value scoring was imperfect because I underestimated storage space and setup time. That mistake changed my preference toward a slightly heavier model with a stronger stand. Test the light at your working distance, not only in a bright showroom. Real conditions expose weaknesses.
