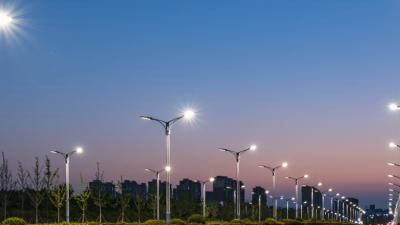
10 Tips for Buying LED Street Lights
Buying led street lights is not just a matter of choosing the brightest fixture. The right system must provide clear, even illumination while controlling energy use and maintenance needs. A road, parking area, and pedestrian path each call for different light distribution. A bright spot beneath a pole can still leave nearby areas dim.
Start with the site itself. Note pole height, spacing, roadway width, traffic patterns, and existing electrical equipment. Then compare photometric plans, not just lumen figures. Check color temperature, glare control, ingress protection, surge protection, and expected lumen maintenance. These details help predict how a fixture may perform after years of outdoor exposure. Ask suppliers for product data and test documentation that supports their claims. A polished specification sheet is useful, but it does not replace a layout based on actual site conditions.
Look beyond the purchase price. Energy consumption, installation work, controls, replacement parts, and warranty terms all affect long-term value. Confirm that the proposed controls fit the operating needs and can be serviced locally. Small details matter. Connector access can affect repair time. So can clear labeling. There is no single fixture that suits every street, and that can make comparison less tidy than expected. The best choice balances safety, visibility, durability, and practical upkeep. These ten tips will help buyers ask better questions, compare options fairly, and avoid decisions based on brightness claims alone.
Define the Road’s Lighting Needs and Installation Conditions
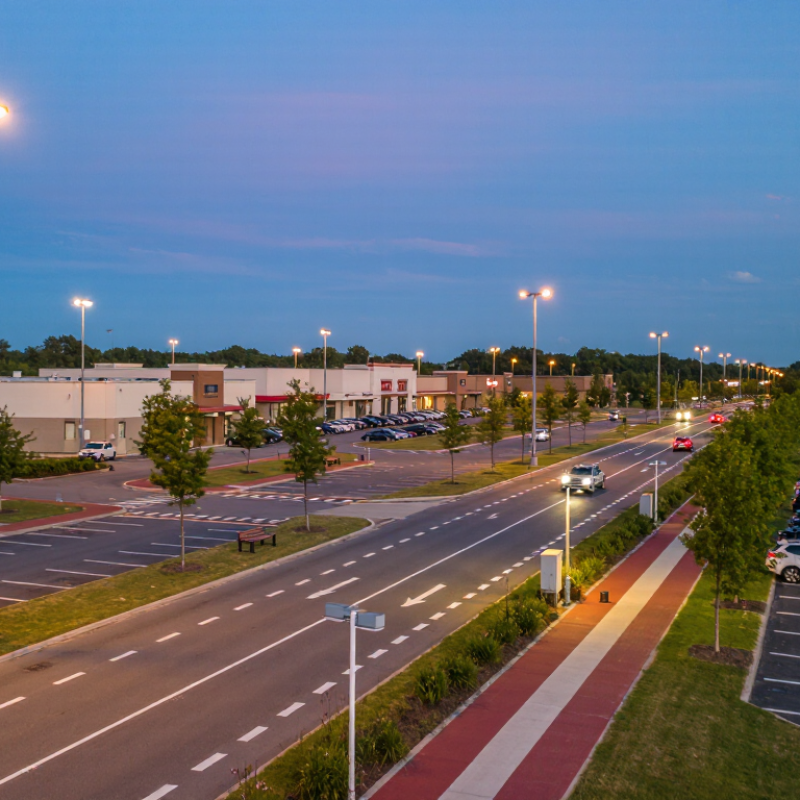
Before comparing LED street lights, describe the road they must serve. A quiet residential lane needs different coverage from a wide arterial with turning lanes and bus stops. Note the road width, traffic speed, pedestrian crossings, trees, and nearby homes. Measure it at night. Existing dark patches can reveal more than a daytime walk-through.
Then record the installation conditions. Check pole height, spacing, arm direction, and the condition of each pole. Nearby buildings or mature trees may block light, while low branches can create glare or shadows. Consider the power supply, cable routes, drainage, wind exposure, and maintenance access. Small details matter. A fixture that looks suitable on a specification sheet may be awkward to reach from a lift truck.
Set lighting targets using applicable local guidance, including brightness and uniformity, rather than choosing by wattage alone. Ask for a layout showing expected light levels at the road surface and crossings. A common planning mistake is to focus on the average and overlook uneven gaps between poles. That part is easy to miss. Recheck assumptions on site, since drawings rarely capture every tree, driveway, or late change to the road. Planning takes patience, and some measurements may need revisiting.
Compare Brightness, Color, and Light Distribution
When buying LED street lights, compare useful light on the road, not just the lumen figure. Lumens describe total output; illuminance describes light reaching the pavement. More is not always better. A fixture that is too bright can create glare while leaving darker patches between poles. Ask for a photometric plan using the proposed mounting height, pole spacing, and road width. Check average illuminance and uniformity, not one bright point beneath a fixture.
Color temperature affects visibility and the character of a street. A cooler white may make details look crisp, but it can also feel harsh in residential areas. A warmer white often appears softer, though the right choice depends on surroundings and project needs. Compare samples outdoors at night when possible. Product sheets are useful, but they cannot fully show how a surface, tree canopy, or wet pavement will look.
Light distribution matters just as much as brightness. Review the fixture’s distribution pattern or photometric file to see whether light reaches sidewalks and road edges without spilling into windows. Match the optics to the street layout; a narrow roadway and a broad intersection rarely need the same pattern. One planning detail is easy to overlook: future tree growth can block light. Even a careful plan may need adjustment after installation, so leave room to review nighttime results and correct uneven areas.
Evaluate Energy Efficiency, Controls, and Compatibility
When comparing LED street lights, look beyond wattage. Check the fixture’s delivered lumens per watt, not just the LED chip’s rating. A photometric report can show whether light reaches the road surface or spills onto sidewalks and nearby windows. Ask for data at the proposed mounting height and spacing. Small differences matter across a long street.
Controls can reduce energy use, but only when they suit the site. A photocell can switch lights based on ambient darkness, while scheduled dimming can lower output during quiet hours. Confirm the dimming range and whether the driver supports the intended control signal. Test a sample fixture with the control system before ordering a large quantity. It is an easy step to overlook. Also check how the system responds after a power interruption; settings may not behave as expected.
Compatibility involves more than matching voltage. Verify input voltage, mounting dimensions, wiring, surge protection, and control connections against existing infrastructure. If fixtures need to connect to a lighting network, confirm that their communication method works with the system already installed. Ask an electrician or lighting professional to review the specifications and site conditions. A spreadsheet cannot reveal every field issue. Even careful planning can miss a local constraint, so record test results and revise the specification when evidence calls for it.
10 Tips for Buying LED Street Lights - Evaluate Energy Efficiency, Controls, and Compatibility
| Tip | What to Evaluate | Useful Data or Benchmark | Compatibility Check |
|---|---|---|---|
| 1. Compare delivered light output | Review the fixture’s tested lumen output and photometric distribution, not wattage alone. | Compare lumens and roadway lighting calculations for the same road layout, pole height, and spacing. | Confirm the light distribution suits the road width and mounting arrangement; request an IES photometric file. |
| 2. Check system efficacy | Assess luminaire efficacy, which relates delivered lumens to input power. | Many contemporary roadway LED luminaires are in the approximate range of 120–180 lm/W; compare tested values for the complete fixture. | Make sure the quoted efficacy applies to the selected output, optics, and operating conditions—not just the LED components. |
| 3. Verify the lighting design | Evaluate average illuminance or luminance, uniformity, and glare for the intended roadway classification. | Use the applicable local roadway lighting standard and a project-specific calculation; requirements vary by road type and jurisdiction. | Check pole spacing, mounting height, arm length, road width, and existing pole locations in the calculation. |
| 4. Review color characteristics | Consider correlated color temperature (CCT), color rendering, and potential effects on the surrounding area. | Common outdoor choices include 3000 K and 4000 K. A lower CCT may be preferred where local policy prioritizes reduced short-wavelength light. | Confirm the selected CCT and color-quality requirements comply with local guidance and project specifications. |
| 5. Examine dimming and control options | Identify supported dimming methods, schedules, photocell operation, and occupancy-based control where appropriate. | Document dimming levels, time periods, and control behavior; energy savings depend on the operating schedule and actual load. | Verify control interfaces, wiring, driver compatibility, and whether control equipment is included or supplied separately. |
| 6. Confirm control-system interoperability | Check whether networked controls use documented, interoperable interfaces and provide the required monitoring functions. | Record supported protocols, commissioning requirements, communication method, and any recurring service or connectivity needs. | Confirm compatibility with the intended management platform, gateways, sensors, and existing control infrastructure. |
| 7. Assess energy use and lifecycle cost | Compare annual electricity consumption, maintenance assumptions, and total cost over the planned service period. | Estimate annual energy as input power in kW × operating hours per year; use the local electricity tariff and realistic dimming assumptions. | Use the same operating hours, energy prices, maintenance assumptions, and analysis period for every option. |
| 8. Check environmental and ingress protection | Review enclosure ratings, corrosion resistance, operating temperature limits, and surge protection. | Common outdoor enclosures are rated IP65 or higher, but the required rating depends on exposure and local conditions. | Match the fixture and electrical protection to the site’s weather, pollution, coastal exposure, and installation conditions. |
| 9. Review serviceability and warranty | Check warranty terms, driver and control-component availability, replaceable parts, and maintenance procedures. | Compare warranty duration and coverage in writing; warranty terms differ by component, operating conditions, and supplier. | Confirm access to replacement components and that maintenance can be performed with the available equipment and staff. |
| 10. Verify installation and regulatory fit | Check electrical ratings, mounting details, safety documentation, and applicable local approvals. | Confirm supply voltage, input current, power factor, and relevant test or certification documents for the project location. | Match the pole tenon or bracket, wiring, grounding, photocell receptacle, and control connection to the existing installation. |
Check Durability, Safety, and Standards Compliance
A street light faces rain, dust, vibration, heat, and repeated power surges. Ask for test reports, not just a claimed service life. The U.S. Department of Energy’s 2019 Solid-State Lighting forecast estimated that widespread LED adoption could save 569 terawatt-hours of electricity annually by 2035. Those savings depend on reliable products and correct installation. A failed driver can leave a roadway dark long before the LEDs reach their rated life.
Check how the manufacturer defines lifetime. “L70” refers to the point when light output falls to 70 percent of its initial level; it does not mean the whole fixture will last that long. Request LM-80 data for LED packages and TM-21 projections, plus thermal test results for the complete luminaire. Look for suitable ingress protection under IEC 60529, and confirm electrical and vibration testing against applicable ANSI/NEMA C136 standards. Small details matter. Inspect seals, cable entries, and the driver compartment; a loose gasket can undermine an impressive rating.
Safety paperwork deserves the same scrutiny. Verify independent certification for the complete fixture, including its power supply, and check surge-protection ratings against local exposure conditions. Confirm that the pole connection fits securely and that replacement parts will remain available. A higher IP rating alone is not proof of better overall durability. I would still compare actual test records carefully; paperwork can look tidy while installation details remain uncertain.
Compare Total Cost, Warranty, and Supplier Support
When comparing LED street lights, look beyond the fixture price. Add installation, wiring, controls, expected energy use, and likely maintenance over the planned service period. Ask suppliers to state their assumptions, such as nightly operating hours and electricity rates. A simple spreadsheet can reveal why a slightly higher purchase price may cost less over time. It will not predict every repair.
Check the warranty details, not just its length. Confirm what it covers: the driver, LED components, and housing may have different terms. Ask whether labor, shipping, and replacement parts are included, and what evidence is needed for a claim. Keep the written terms with the quote. A long warranty can sound reassuring, but exclusions may matter more than the headline number.
Supplier support affects project costs too. Before ordering, ask who reviews the lighting layout, supplies photometric files, and answers technical questions after installation. Get a realistic response-time estimate and check whether common spare parts are available. If a road section goes dark, waiting weeks for guidance is not a small inconvenience. Still, no comparison captures every local condition; pole spacing and weather can change maintenance needs. That part requires judgment.
10 Tips for Buying LED Street Lights: Compare Total Cost, Warranty, and Supplier Support
Estimated 10-year electricity cost for one street light: LED vs. high-pressure sodium (HPS).
Illustrative estimate: LED uses 100 W and HPS uses 250 W; both operate 12 hours daily for 10 years. At $0.15 per kWh, estimated electricity costs are $657 for LED and $1,642.50 for HPS. Actual costs vary with tariffs, usage, and fixture performance. Compare purchase and installation costs too, and check warranty coverage, replacement terms, and the supplier’s technical support before buying.
Related Posts
-
What Are the Top LED Street Lights for Global Buyers?
-
Why Choose LED Street Lights for Global Projects?
-
Common Issues Faced When Choosing the Best Outdoor Solar Lights for Your Home
-
2024's Ultimate Guide: 15 Best Solar LED Lights for Sustainable Energy Savings
-
Unlocking Sustainability with Solar LED Lights Advantages for Your Home and Business
-
Transform Your Neighborhood with Innovative Solar Street Lights: A Sustainable Solution for Safer Streets